Bridgerton Hair: How To Recreate Nicola Coughlan's Stunning Loose Curls
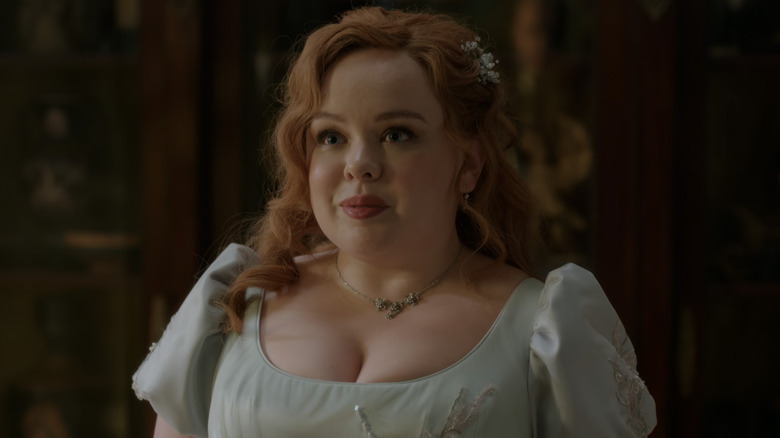
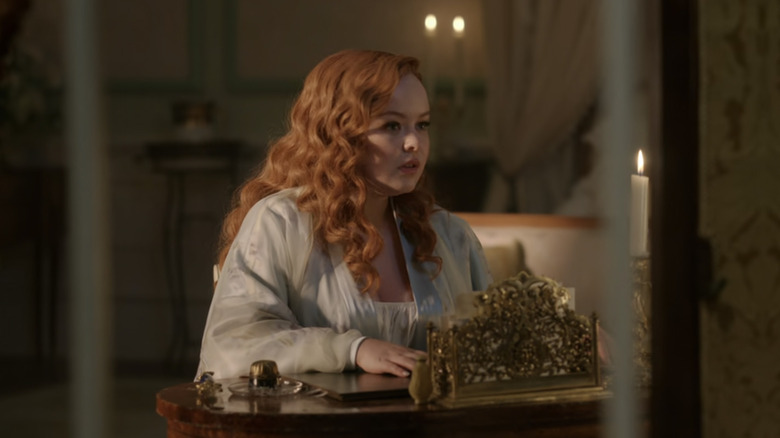
Even if you've yet to fall down the "Bridgerton" rabbit hole, you'll likely be well aware of the fashion and style. As much as the series serves up exciting plot lines and twists, the costume department really delivers as well. Especially when it comes to Ms. Penelope Featherington, played by the exceptional and iconic Nicola Coughlan.
"Usually we see the cast in little to no makeup as the show is supposed to be dated in the 1800s," celebrity makeup artist Dani Parkes told Real Simple. "However, because they wanted Nicola's character to have such a big transformation we see them put more makeup on her character."
Not only has Penelope undergone a major glow-up with her makeup, but her hair has also been raved about this season. In fact, TikTok has been busting at the seams with tutorials on how to get those amazing curls Nicola rocks in every episode. If you, like so many others, have been wanting to recreate those stunning loose tendrils, you absolutely can. You just need the right tools and some patience.
Start with clean hair and the right tools
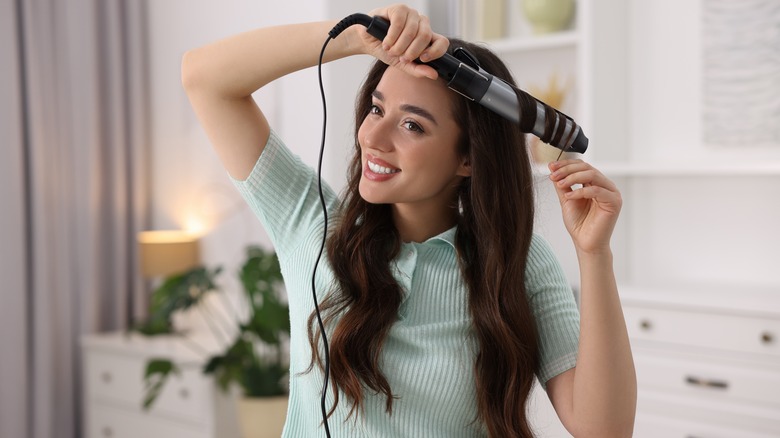
Although there's some wiggle room on how to make these curls happen, you need these essentials: a comb to divide your hair into sections, a curling iron for those magnificent waves, hair pins to keep them up and out of your way while curling, and, of course, hair products. What you choose for products — pomade vs. hairspray — is going to come down to the look you're trying to achieve as well as your hair's texture.
"Penelope's elegant waves have been a favorite look of the season," senior stylist Stéphane Ferreira told Country and Townhouse. "They feature a strong side part with glossy waves cascading over one shoulder, with a few curls gelled around the opposite side of the face."
Like you would when styling your hair for any occasion, you want it washed and conditioned. While still damp, take a comb to create a defining side part. When your hair is dry, separate the hair into sections. Then, use the curling iron to create the curls, piece by piece around the crown of the head, followed by the sections underneath along the nape of the neck. As you curl each section, clip them in place until all the pieces have been rolled into thick curls.
Finish it up with your favorite hair products to hold the curls in place
Once every section has been curled and pinned, it's time for the big reveal. Gently and slowly pull the pins from the curls in a downward motion to give them their bounce. Because the key is to have dramatic curls, as opposed to tight ones, run a comb or brush through them while applying hairspray. If you want, you can pin back one side as Penelope does and use a thinner curling iron to create a few small curls around the face. If you choose this option, then gel is going to be your best friend.
Depending on the type of hair you have, this may be where you realize you need more hairspray or pomade to keep the curls in place for as long as possible. People with pin-straight hair know from experience that it takes quite a bit of product to keep curls from falling flat too soon. If you're new to curling irons or curling your hair in general, getting Penelope's curls could take some practice. But as long as you have a thick-barrel curling iron and the necessary tools, you'll get there. The final step will be dying it red. That is, if you want to get that authentic about it.